Contents
- Index
Drawing Tapered Bands
See Below

On the main data entry form, look in the "Body Band and Grease Groove Detail" panel.

Check the "No Taper" check-box, the check box label will change to  and the
  button will become visible. Click the button and the Tapered Band Edit panel will appear.
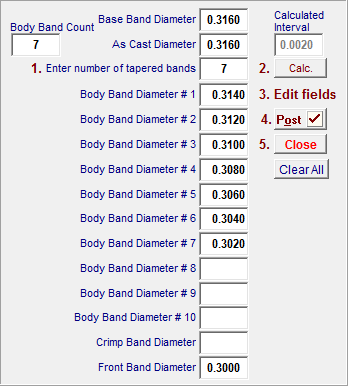
1. Enter the desired number of tapered bands with a value equal to or less than the displayed body band count.
2. Click the "Calc" button and the software will calculated the diameter of the tapered bands in equally graduated steps from the diameter of either the front band or crimp groove band up to the as-cast diameter. These incremental steps are calculated as a guide only and may be edited as needed.
3. All of the displayed band diameters may be edited from this panel. If front band or crimp band diameters need to be edited, make the changes in the edit fields. If the front band value is edited, the edited value is for the rear edge of the front band. Be sure to return to the data entry page and edit the front band forward diameter to reflect the change.
4. Click the "Post" button to save all the edited diameters to the bullet record. The software will save these values in the bullet record and they need not be entered again.
5. Finally, click the "Close" button to exit the Tapered Band edit panel.
Clicking the "Clear All" button will delete all fields except the base band value and or the front band and crimp band values.
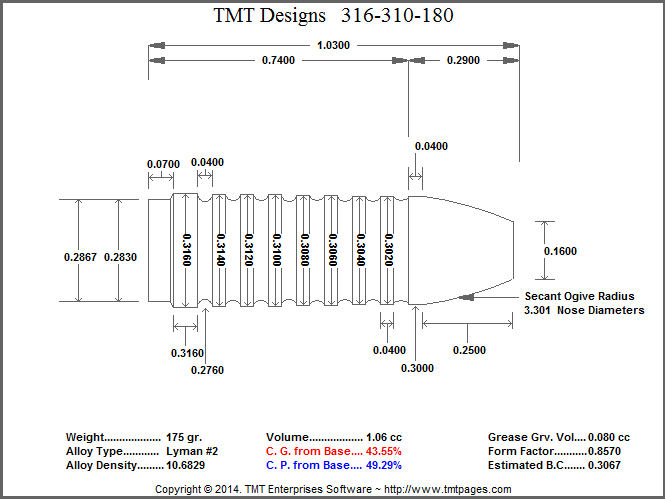
A sketch display of the tapered band design.