Contents
- Index
Resize Images
Drawing a large bitmap image and then resizing a bitmap to a smaller size will usually result in a softer, more pleasing image.that blends the pixels used to construct the curves and angles of the drawing.
The use of various filters within the resizing algorithm produces image qualities ranging from poor to excellent. The better quality re sized images take more time to generate and, If the image is initially large, it can take a long time to finish the resizing process.
Click on each control or button outlined in the image below to jump to a description of the control function that is located in this topic.
Click on Back to Image to return.
If the link is to another topic then click on the  at the upper left of the page to return.
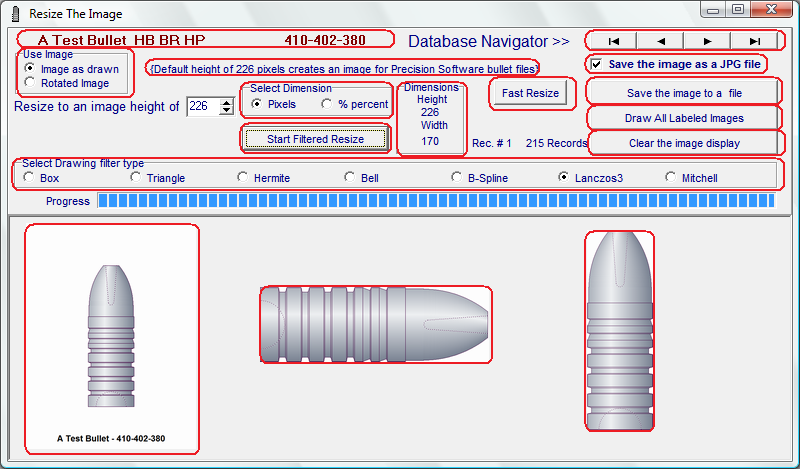
Selected Bullet record:
This Text indicates the title, description and ID number of the selected bullet record
(Backto Image)
Selected :
Checking or Un-Checking this box will turn on or turn off the pop-up help hints that appear when the cursor is hovered over a control or feature on the module.
(Backto Image)
Rotated or As-Drawn images:
If the image has been rotated then choose the Rotated Image button to select the rotated image to be re sized.
If the image is to be re sized as drawn choose the Image as drawn button.
(Backto Image)
Selecting the final size of the re sized image :
A default height value of 226 PIXELS indicates that the re sized image will be drawn 226 pixels in height and the width will be proportional to the original image.
This initial height of 226 pixels is the size of the bullet image icons that are used in the Professional Precision Ballistics, Load Records and Ballistic Coefficient modules.
The size of the re sized image may be determined either as a percentage of the original bitmap or as a pixel height value.
Clicking the %percent radio button will calculate the percentage of the pixel height of the re sized image as compared to the original image.
Clicking the Pixels radio button will calculate the pixel height of the re sized image as indicated by the percent value of the original image.
The value window may be edited either by typing in a value or using the Spin Edit arrows to increment the value up or down. The keyboard up/down arrows will also increment the value.
The height and width of the re sized image will be displayed in the Dimensions box at the right of the controls.
(Backto Image)
Fast Resize Button:
Clicking this button will rapidly resize the original image.
If the image is small, the quality of the image will be poor.
Larger re sized images may be of acceptable quality.
You can use this button to test different pixel or percentage size values and then select the filter of your choice to resize an image of better quality.
(Backto Image)
Start Filtered Resize button:
Use this button to start resizing the image using the process selected in the Drawing Filter Radio Button Box
(Backto Image)
Save Image as a JPEG file checkbox:
If this box is checked, the image will be saved in a JPG file format. If the box is not checked the image will be saved in a BMP file format. Jpeg files are significantly smaller than bitmap files and take up less space on the hard drive.
(Backto Image)
Select a drawing filter type Radio Button Box:
The radio buttons determine the filter to be used in the resize operation. The resulting quality and time needed to resize the image increases from left to right in the selections.
(Backto Image)
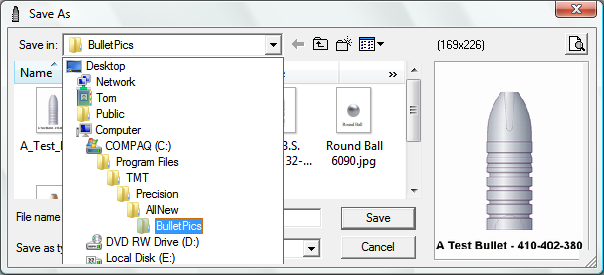
Save the Image to a file Button:
Click here to open a File Save Dialog that will allow you to choose a place on your computer to save the re sized file in the format that has been selected with the above checkboxes.
(Backto Image)
Draw and Save all Bullet Record Images to a file Button:
Click here to open a File Save Dialog that will allow you to choose a place on your computer to sequentially step through all the bullet records and draw and save the re sized image files in the format that has been selected with the above checkboxes.
(Backto Image)
Clear the Image button:
Click this button to clear the re sized image from the drawing window
(Backto Image)
The Re sized Image Window:
The re sized image will be drawn and displayed in this window. The three images shown in this help file are shown as a demonstration of the different results that may be produced. The software will only display one image at a time.
(Backto Image)
Copyright ©, TMT Enterprises 2012
Selected Bullet record:
This Text indicates the title, description and ID number of the selected bullet record
(Backto Image)
Selected Bullet record:
Checking or Un-Checking this box will turn on or turn off the pop-up help hints that appear when the cursor is hovered over a control or feature on the module.
(Backto Image)
Rotated or As-Drawn images:
If the image has been rotated then choose the Rotated Image button to select the rotated image to be re sized.
If the image is to be re sized as drawn choose the Image as drawn button.
(Backto Image)
Selecting the final size of the re sized image :
A default height value of 226 PIXELS indicates that the re sized image will be drawn 226 pixels in height and the width will be proportional to the original image.
This initial height of 226 pixels is the size of the bullet image icons that are used in the Professional Precision Ballistics, Load Records and Ballistic Coefficient modules.
The size of the re sized image may be determined either as a percentage of the original bitmap or as a pixel height value.
Clicking the %percent radio button will calculate the percentage of the pixel height of the re sized image as compared to the original image.
Clicking the Pixels radio button will calculate the pixel height of the re sized image as indicated by the percent value of the original image.
The value window may be edited either by typing in a value or using the Spin Edit arrows to increment the value up or down. The keyboard up/down arrows will also increment the value.
The height and width of the re sized image will be displayed in the Dimensions box at the right of the controls.
(Backto Image)
Fast Resize Button:
Clicking this button will rapidly resize the original image.
If the image is small, the quality of the image will be poor.
Larger re sized images may be of acceptable quality.
You can use this button to test different pixel or percentage size values and then select the filter of your choice to resize an image of better quality.
(Backto Image)
Start Filtered Resize button:
Use this button to start resizing the image using the process selected in the Drawing Filter Radio Button Box
(Backto Image)
Save Image as a JPEG file checkbox:
If this box is checked, the image will be saved in a JPG file format. If the box is not checked the image will be saved in a BMP file format. Jpeg files are significantly smaller than bitmap files and take up less space on the hard drive.
(Backto Image)
Draw Transparent Bitmap checkbox:
If the "Save Image as a JPEG file" check box is not checked, the file will be saved as a bitmap image.
Check this "Draw Transparent Bitmap checkbox" to draw the bitmap with a transparent background. This will allow the bitmap to be copied onto another bitmap image as just a bullet image, without the surrounding background.
(Backto Image)
Select a drawing filter type Radio Button Box:
The radio buttons determine the filter to be used in the resize operation. The resulting quality and time needed to resize the image increases from left to right in the selections.
(Backto Image)
Save the Image to a file Button:
Click here to open a File Save Dialog that will allow you to choose a place on your computer to save the re sized file in the format that has been selected with the above checkboxes.
(Backto Image)
Clear the Image button:
Click this button to clear the re sized image from the drawing window
(Backto Image)
Save Image as drawn as an Icon button:
When the "Draw and Install an Icon" button is clicked an icon of the correct size will be drawn and placed in the bullet record. If this button is clicked the image, as displayed, will be placed in the bullet record
(Backto Image)
Draw and install an Icon
Clicking this button will cause an Icon of the correct dimensions to be drawn and displayed with the selected bullet record when the record is viewed in the Search/Select module
(Backto Image)
The Re sized Image Window:
The re sized image will be drawn and displayed in this window. The three images shown in this help file are shown as a demonstration of the different results that may be produced. The software will only display one image at a time.
(Backto Image)
Copyright ©, TMT Enterprises 2012